
Updating a period home without erasing its soul is the primary challenge for any custodian; the key lies in treating restoration as an act of stewardship, not just decoration.
- Original features are not just aesthetic; they represent a quantifiable financial premium and irreplaceable craftsmanship.
- The correct sequence of restoration—from structural to decorative—is non-negotiable to avoid costly rework and preserve the building’s integrity.
Recommendation: Prioritize understanding and restoring existing features before considering any new decorative layers. Your home’s history is its greatest asset.
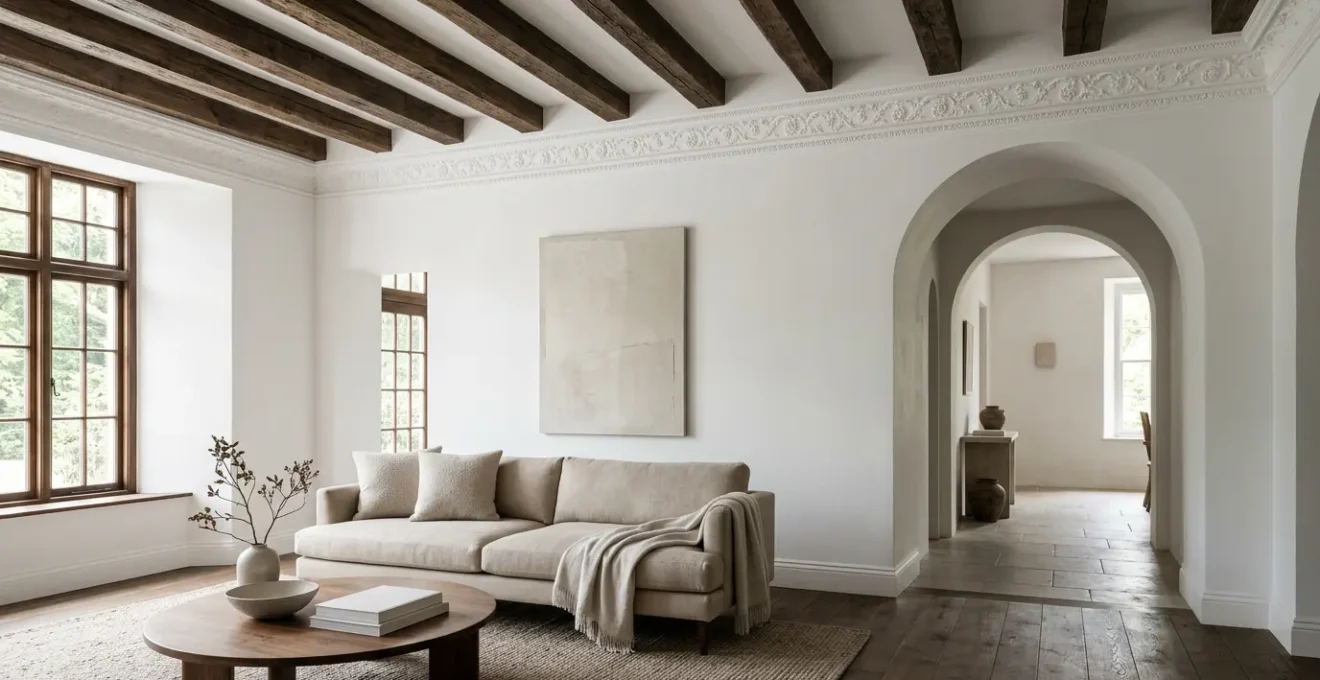
Owning a period property is a unique privilege. Beyond providing shelter, these homes are living documents, their beams, moldings, and arches telling a story of past eras and forgotten craftsmanship. The temptation to “modernize” can be strong, often leading homeowners to follow generic advice that involves covering up or, worse, removing these defining elements. Many believe a fresh coat of white paint or ripping out a “dated” fireplace is the fastest route to a contemporary feel.
However, this approach frequently overlooks a fundamental truth: the most profound value of a character home lies in its authenticity. The true art of enhancing such a property is not found in imposing a new identity upon it, but in a delicate act of curatorial stewardship. It involves revealing and celebrating the home’s intrinsic architectural narrative. This is not about resisting modernity, but about integrating it thoughtfully, in a way that respects the structure’s history and soul.
This guide moves beyond superficial decorating tips. We will explore the principles of preservation, the technicalities of restoration, and the strategic design choices that allow historical and contemporary elements to coexist harmoniously. By adopting this mindset, you can not only preserve the unique character of your home but also significantly enhance its emotional and financial worth.
This article provides a structured approach to help you make informed decisions. From understanding the value of what you have to the correct order of operations, each section is designed to build your confidence as a custodian of your home’s heritage.
Summary: A Custodian’s Guide to Enhancing Period Architectural Features
- Why original architectural features increase your property value significantly?
- How to restore plaster cornices that have been painted over 10 times?
- Painting trim white vs. contrast color: which modernizes a period home better?
- The error of removing features that give your home its soul and character
- In what order should you restore features before starting wall decoration?
- Why exposing your brick walls can increase your property value by 10%?
- Why textured wallpaper hides cracks better than 5 layers of paint?
- When to add a “punch” of black to anchor a muted palette?
Why original architectural features increase your property value significantly?
In a market saturated with standardized new builds, authenticity has become the ultimate luxury. Original architectural features—such as intricate plasterwork, hand-carved newel posts, or original hardwood floors—are not merely decorative. They are markers of an era’s craftsmanship, a quality that is prohibitively expensive, if not impossible, to replicate today. This uniqueness translates directly into market value. Prospective buyers are not just purchasing a property; they are investing in a piece of history and a home with an irreplaceable narrative.
This sentiment is reflected in market data, where it’s clear that buyers often place a premium on homes with historical character. While the broader home improvement market is substantial, with Americans investing an estimated $603 billion in 2024, the return on investment is not equal across all projects. Restoring and highlighting original features often yields a higher return than generic renovations because it enhances the property’s core unique selling proposition.
The value is twofold. First, there is the tangible, aesthetic appeal that creates a powerful first impression and emotional connection. Second, there is the implicit assurance of quality construction that often comes with older homes. These features signal that the building has stood the test of time, a testament to its structural and material integrity. In essence, preserving these details is one of the most intelligent investments a period homeowner can make, securing both the soul of the home and its financial appreciation.
A well-executed restoration project, like the case of a late-19th-century Victorian home, demonstrates this principle perfectly. By restoring original floors and fireplaces while thoughtfully integrating modern systems, the home retained its historic charm and became a highly desirable, functional space for modern living, leading to a significant increase in its market value.
How to restore plaster cornices that have been painted over 10 times?
Plaster cornices and moldings are often the unsung heroes of a period interior, but decades of paint can obscure their delicate details, transforming intricate reliefs into lumpy, indistinct bands. Restoring them is a meticulous process that requires patience and a gentle hand, but the results can be transformative. The goal is to strip away the suffocating layers of paint without damaging the fragile plaster beneath. This is not a job for aggressive sanding or harsh, generic chemical strippers.
The professional approach begins with a careful assessment, which must include testing for lead paint, especially in homes built before 1978. Once safety is ensured, the slow process of removal can begin. A poultice-based chemical stripper is often the preferred method. This involves applying a thick paste to the cornice, covering it with wax paper to keep it moist, and allowing it to soften multiple paint layers at once. After a set time, the poultice and softened paint are carefully scraped away with dental tools, small brushes, and plastic scrapers to gently reveal the original details.
For damaged or missing sections, all is not lost. A skilled restorer can take a silicone mold from an intact portion of the cornice. This mold is then used to cast a new section in plaster, which can be seamlessly integrated into the existing run. This technique ensures the architectural continuity of the feature. The final step is choosing a finish that allows the plaster to breathe, such as a soft distemper or a traditional limewash, which provides a beautiful, chalky finish true to the home’s heritage.
As the illustration above demonstrates, the reward for this painstaking work is the resurrection of sharp, elegant detail. The interplay of light and shadow returns, and the cornice once again performs its intended function: to beautifully articulate the transition between wall and ceiling. It’s an act of archeology as much as decoration.
Painting trim white vs. contrast color: which modernizes a period home better?
The question of how to paint architectural trim—moldings, architraves, and skirting boards—is a perennial debate among period homeowners. The default choice for decades has been a crisp, clean white, intended to make the features “pop” against a colored wall. While this approach is classic and can certainly be effective, it is not the only, nor always the best, way to modernize a space while honoring its character. The choice between white, a contrast color, or even matching the wall color depends entirely on the desired effect and the room’s specific architecture.
As Texas-based luxury interior designer Charmaine Wynter notes, the very presence and scale of trim can add value. As she explains in a recent article, “Crown moldings can impact the perceived value of a property simply by increasing their height. The higher the baseboard trim or crown molding, the more costly it is thought to be as well.” Given this inherent value, how we paint them is a critical decision. A bold, contrasting color (such as a deep grey or a muted green) can be incredibly effective at highlighting the geometry of the trim, turning it into a deliberate design statement. This works particularly well in rooms with high ceilings, where a darker trim can help “ground” the space and add a sense of luxury.
A more contemporary and sophisticated approach is “color drenching,” where the walls, trim, and sometimes even the ceiling are painted the same color. Far from hiding the features, this technique creates a seamless, enveloping effect that allows the architectural form—the shadows and reliefs of the molding—to speak for itself. It emphasizes texture over color separation, resulting in a calm, cohesive, and thoroughly modern interpretation of a period space. The choice ultimately depends on the story you want the room to tell.
This table helps clarify the distinct impact of each approach, moving beyond the simple white-versus-color dichotomy.
| Aspect | White Trim | Contrast Color Trim | Color Drenching |
|---|---|---|---|
| Visual Effect | Clean, classic separation | Bold architectural emphasis | Sophisticated envelope effect |
| Space Perception | Makes rooms feel taller with high ceilings | Defines room boundaries clearly | Creates seamless flow |
| Style Match | Traditional, timeless | Statement-making, luxury | Contemporary, minimalist |
| Best For | Period homes seeking classic elegance | High ceilings needing grounding | Modern interpretation of period spaces |
| Maintenance | Shows dirt easily, requires frequent cleaning | Can hide imperfections better | Unified surface easier to maintain |
The error of removing features that give your home its soul and character
In the pursuit of open-plan living and minimalist aesthetics, one of the most tragic and irreversible mistakes is the removal of original architectural features. Ripping out a chimney breast, replacing intricate sash windows with characterless uPVC, or tearing down a wall with its original archway is not just a renovation choice; it is an act of erasure. These features are the very DNA of a period home. They are the physical embodiment of its history, its craftsmanship, and its soul. Once they are gone, they are gone forever.
The impulse to remove them often stems from a misunderstanding of their function or a short-sighted view of design trends. What might seem like an “obstructive” chimney breast is actually the historic heart of a room, an anchor for furniture and a source of immense character. Those “drafty” sash windows are often made from incredibly durable old-growth wood and are designed to be repaired, not replaced, offering a sustainable and beautiful alternative to plastic. Removing them severs a connection to the home’s past and diminishes its architectural narrative.
As restoration experts at Kraus Restoration eloquently state, this is a profound loss: “Every cornice, beam, or hand-carved newel post represents a chapter in architectural history. Changing or replacing these without consideration risks erasing the very character that makes the home valuable.” This isn’t just a sentimental argument; it’s a financial one. As noted earlier, properties that retain their authentic character command a premium. To remove these features is to actively devalue the very asset that makes the home unique and desirable.
The cost and difficulty of recreating these lost details are astronomical, often making it an impractical fantasy for future owners. The better path is always one of preservation and thoughtful integration. Before reaching for the sledgehammer, a homeowner should consider themselves a custodian, tasked with carrying the home’s story forward, not ending it. The challenge is to work *with* the features, not against them, to create a home that is both functional for today and respectful of yesterday.
In what order should you restore features before starting wall decoration?
A period home restoration is not a weekend decorating project; it is a complex sequence of tasks where the order of operations is critical. Tackling jobs in the wrong sequence can lead to damaging newly finished work, wasting time and money, and compromising the overall quality of the project. The guiding principle is to work from the most disruptive and messy tasks to the least, and from the top down. Wall decoration—the final paint or wallpaper—should always be the very last step in the process, the jewel in the crown of a properly prepared setting.
Before a single paintbrush is lifted for the final finish, the structural and “first-fix” elements must be addressed. This means ensuring the building is stable and weatherproof. Any work on the foundation, roof, or drainage systems comes first. This is followed by major systems updates, such as rewiring, plumbing, and HVAC installation. While this work should be done with minimal architectural alteration, some chasing into walls may be necessary, making it a prerequisite to any surface finishing.
Once the house is sound and the major systems are in place, the focus shifts to internal features that create significant dust and disruption. This includes plastering and chimney restoration. Only after this can you move on to floor sanding and refinishing, as this requires a cleared space and also generates considerable dust. The final preparatory stages involve the detailed work of paint stripping from woodwork and restoring windows. Only when all this is complete—when the dust has settled and all structural and preparatory work is done—is the room ready for its final decorative skin.
Your Restoration Action Plan: A Strategic Workflow
- Structural Repairs: Address the skeleton first. This includes foundation reinforcement, beam replacement, and ensuring framing stability.
- Roof and Water Management: Make the building weatherproof. Fix all leaks, replace failing gutters, and ensure proper site drainage to prevent future issues.
- Major Systems: Update electrical, plumbing, and HVAC systems. This “first fix” work must be completed before any walls are closed up or finished.
- Chimney and Plaster Restoration: Tackle the messiest interior jobs next. This work generates heavy dust that would ruin finished surfaces.
- Floor Sanding and Refinishing: With the heaviest work done, restore the floors. This still creates dust and requires a completely cleared space.
- Paint Stripping and Window Restoration: Focus on the detailed preparation of architectural elements before final painting.
- Final Wall Finishing: The last step. Apply your chosen decorative paint or wallpaper to the fully prepared and sound surfaces.
Why exposing your brick walls can increase your property value by 10%?
The exposed brick wall has become an iconic feature, synonymous with rustic charm, industrial chic, and a sense of history. When done correctly, it can indeed add significant character and value to a property. The appeal lies in its material honesty—a raw, textural element that provides a powerful contrast to smooth, plastered walls and modern finishes. The often-quoted “10% increase” figure is more of an industry rule of thumb than a hard statistic, but it reflects the high desirability of this feature in many markets, especially in urban lofts or period conversions where the brick tells a story of the building’s industrial past.
However, exposing a brick wall is not as simple as taking a hammer to the plaster. Success is highly conditional. The first consideration is the quality of the brick itself. Not all brick was intended to be a final finish; some interior brick (known as “common brick”) is softer, less uniform, and may be in poor condition. Exposing it can lead to problems with dust, crumbling, and poor insulation. Furthermore, exterior-facing brick walls require careful consideration of moisture and insulation. Removing the plaster, a protective layer, can sometimes lead to issues with dampness and thermal bridging if not managed with proper sealing and repointing.
The positive financial impact of home improvements is gaining traction again, as the 2024 Cost vs. Value report shows a 5.2% increase in average ROI, reversing previous declines. An exposed brick project, if suitable for the property, can be a part of this positive trend. If the original brick isn’t viable, there are alternative approaches. A German Schmear technique (applying a light mortar wash) can provide texture and character without full exposure. Another strategic choice is to expose only a small section, like a chimney breast, creating a powerful focal point without committing an entire room to the potential drawbacks of a full brick wall.
Ultimately, the decision to expose brick should be a considered one. When the brick is of good quality and the home’s style supports it, it becomes a timeless, durable, and aesthetically pleasing feature that connects the interior to the building’s fundamental structure, adding both charm and tangible value.
Why textured wallpaper hides cracks better than 5 layers of paint?
Every owner of a period home is familiar with the slow-motion battle against hairline cracks in plaster walls. Caused by natural settling, temperature fluctuations, or minor structural movement, these cracks can be a persistent frustration. The common reflex is to simply paint over them. However, after a few seasons, the crack often reappears, grinning through the new layer of emulsion. Adding more paint is a temporary fix that ultimately compounds the problem, building up a thick, brittle surface that obscures architectural detail and is difficult to remove later.
A far superior, and more historically appropriate, solution is the use of a quality lining paper or a textured, paintable wallpaper like Anaglypta. This approach works on a fundamentally different principle. Instead of just covering the crack, the paper provides a flexible, unifying layer across the wall surface. It has a degree of tensile strength that helps to bridge the crack and absorb minor movements, preventing it from showing through. It reinforces the old plaster, providing a stable, perfect canvas for paint.
However, it is crucial to approach this with an expert mindset. As one construction industry guide wisely puts it, wallpaper should be seen as a “‘Symptom Manager, Not a Cure’.” Before covering any crack, the first critical step is to diagnose its cause. Is it a simple, non-structural settlement crack, or is it a sign of a more serious structural issue that needs to be addressed? Covering a structural problem is not just bad practice; it’s dangerous. Once you’ve confirmed the cracks are cosmetic, a high-quality wall covering is the superior long-term strategy.
The comparison below illustrates why a single investment in a proper wall covering is more effective and economical over time than repeatedly applying layers of paint.
| Factor | Multiple Paint Layers | Quality Lining Paper/Anaglypta |
|---|---|---|
| Crack Coverage | Temporary, cracks reappear | Reinforces plaster, long-term solution |
| Surface Quality | Builds up, loses detail | Maintains architectural details |
| Future Maintenance | Difficult to remove/repair | Provides perfect canvas for paint |
| Wall Reinforcement | None | Adds structural support |
| Cost Over Time | Repeated applications needed | One-time investment |
Key takeaways
- True value lies in authenticity; preserving original features is a direct investment in your property’s unique selling proposition.
- A strict restoration sequence (structural > systems > surfaces) is non-negotiable to prevent costly errors and ensure a quality finish.
- Design choices like paint color should be deliberate acts of curation, used to either define, separate, or unify architectural elements based on a clear goal.
When to add a “punch” of black to anchor a muted palette?
In a period home with a soft, muted, or neutral color scheme, a strategic “punch” of black can be transformative. It acts as an anchor, a point of definition that prevents the space from feeling washed out or bland. Black is not just a color; it’s a visual full stop. It grounds the palette, sharpens surrounding colors, and adds a layer of graphic sophistication that bridges the gap between historic architecture and contemporary design. The key is not to overwhelm the space, but to use black sparingly on specific architectural “punctuation marks.”
As design experts at Paintzen confirm, this can be an energizing choice: ” Painting trim black or charcoal gray can energize a room, thanks to the contrast and visual pop. It can also hide imperfections in the crown molding or trim.” The trick is to apply it with precision. Consider using black on the thin frames of windows or doors, especially Crittall-style steel frames, to create a picture-frame effect that draws the eye to the view beyond. It’s also incredibly effective on original cast-iron elements, such as a fireplace surround or traditional radiators, celebrating their industrial heritage.
The application of black need not be limited to paint. Materiality can play a huge role. A honed slate hearthstone, wrought iron light fixtures, or an ebonized finish on a single exposed beam can introduce this grounding element in a more organic way. The finish is also important; a high-gloss or semi-gloss black on a door casing or window frame will reflect light dramatically, creating dynamic highlights that further define its form. Used thoughtfully, black is the ultimate tool for adding definition, drama, and a touch of modern elegance to a period interior.
For a successful application, consider these strategic placements:
- Apply black to architectural ‘punctuation marks’ like window frames, door casings, or the edges of an archway.
- Use it on historic cast-iron elements such as fireplace surrounds or original radiators to celebrate their material.
- Consider thin metal frames of Crittall-style doors or steel windows for a graphic effect.
- Introduce black through materials like honed slate for hearths or wrought iron for fixtures.
- Apply ebonized wood finishes to exposed beams or select built-in cabinetry for a deep, sophisticated look.
By approaching your period home with a mindset of curatorial stewardship, you move beyond fleeting trends and engage in a meaningful dialogue with its history. Every decision, from the order of restoration to the choice of a paint finish, becomes an opportunity to honor the craftsmanship of the past while creating a beautiful, functional home for the future. This is the path to truly enhancing your home’s character and securing its lasting value.