
A dimmer switch is not an accessory; it is a precision control system for your home’s energy, ambiance, and even your well-being.
- Dimming lights correctly can align with your body’s circadian rhythm, improving sleep quality.
- Using a dimmer extends the lifespan of expensive bulbs and prevents common issues like LED flicker when properly matched.
Recommendation: Move beyond thinking of lighting as a simple utility and start using dimmers to actively manage your environment for maximum efficiency, comfort, and control.
For most homeowners, a light switch has two functions: on and off. It’s a binary, utilitarian component of a room. But this view overlooks one of the most powerful and versatile tools in home design and energy management: the dimmer switch. Far from being a mere mood-setter for dinner parties, a modern dimmer is a sophisticated controller that allows you to manage everything from your home’s energy consumption to the longevity of your light bulbs. In fact, for many, the installation is surprisingly straightforward, with some guides suggesting a standard dimmer can be installed in about 15 minutes.
While the benefits of “mood lighting” are well-known, the true potential of dimmers lies in a deeper, more strategic application. It’s about understanding how light intensity affects your biology, how voltage impacts your fixtures, and how to visually sculpt a space with light. The common advice to “just make sure your bulbs are dimmable” barely scratches the surface of what’s possible and what can go wrong, like the frustrating flicker or strobe of incompatible LEDs.
This guide abandons the generic advice. Instead, we will explore the core mechanics of how dimmers operate as a precise control system. You will learn not just *what* they do, but *how* and *why* they do it. We’ll move beyond the obvious to give you the technical and strategic framework to wield light with expert precision, turning a simple circuit into a dynamic feature of your home.
This article provides a comprehensive roadmap for mastering your home’s lighting. From the science of sleep to the specifics of wiring, the following sections will equip you with the knowledge to make informed, efficient choices.
Contents: Mastering Your Home’s Lighting Control
- Why dimming lights by 50% two hours before bed helps you sleep better?
- The LED compatibility error that causes your dimmed lights to strobe
- How using a dimmer at 90% doubles the life of your expensive vintage bulbs?
- How to use dimmers to “turn off” the kitchen visually while eating in the dining room?
- Smart dimmers vs. Standard: which works in older homes with old wiring?
- How to track sun angles to plan your reading nook for winter afternoons?
- 3000K vs. 4000K: which bulb temperature flatters your interior finishes best?
- Master Suite Design: Creating a Restorative Sanctuary That Improves Sleep Quality
Why dimming lights by 50% two hours before bed helps you sleep better?
The connection between light and sleep is fundamental to human biology. Our bodies operate on a 24-hour internal clock known as the circadian rhythm, which is primarily regulated by light exposure. Bright, cool-toned light signals to the brain that it’s daytime, promoting alertness and suppressing the production of melatonin, the hormone that induces sleep. Conversely, the absence of bright light allows melatonin levels to rise, preparing the body for rest. This is a process of circadian entrainment that has governed our sleep-wake cycles for millennia.
In the modern home, however, we often disrupt this natural process with harsh, full-intensity artificial lighting late into the evening. A standard light switch offers no middle ground. This is where a dimmer becomes a powerful tool for wellness. By dimming your lights to 50% or less for one to two hours before your intended bedtime, you simulate the gradual fading of natural daylight. This reduction in light intensity sends a clear signal to your brain to begin producing melatonin.
Using a dimmer to create a “digital sunset” is a proactive way to take control of your sleep hygiene. It’s not just about making a room feel cozier; it’s a deliberate manipulation of an environmental cue to support your body’s natural processes. Smart dimmers elevate this control, allowing you to automate the dimming process so it happens consistently every night without a second thought, creating a seamless transition from the activity of the day to the restorative calm of the night.
The LED compatibility error that causes your dimmed lights to strobe
One of the most common frustrations for homeowners upgrading to dimmers is the dreaded LED flicker, pulse, or strobe. You install a new dimmer, connect it to your modern LED bulbs, and instead of a smooth fade, you get an irritating, inconsistent flashing. This isn’t a sign of a defective dimmer or bulb; it’s a classic symptom of a load compatibility mismatch. Unlike simple incandescent bulbs, LED drivers have complex electronics that require a minimum amount of power to function correctly.
The issue stems from two main types of incompatibility. First, not all LED bulbs are designed to be dimmed. A “non-dimmable” LED will often flicker or fail entirely when connected to a dimmer. Second, and more subtly, even dimmable LEDs have a minimum power requirement. As a dimmer reduces the voltage, it can fall below the threshold the LED’s internal driver needs to operate smoothly. According to lighting control experts, a common dimmer may have a minimum load requirement of 10W of incandescent lighting or one approved dimmable LED to ensure flicker-free performance. If your single, highly efficient 7W LED bulb is below that threshold, strobing can occur.
Many modern, high-quality dimmers designed for LEDs have a hidden adjustment dial to solve this. This small control allows you to set the bottom end of the dimming range, effectively telling the switch not to go below the point where the bulb becomes unstable. Calibrating this “low-end trim” prevents the dimmer from dropping the power into the bulb’s flicker zone.
As the image shows, this calibration mechanism is a precise piece of engineering. Setting it correctly is the key to achieving that smooth, satisfying dimming performance with LED technology. It’s the difference between a frustrating lighting experience and one that is perfectly controlled and efficient. Always choose a dimmer explicitly rated for LED/CFL compatibility and check for an adjustment feature.
How using a dimmer at 90% doubles the life of your expensive vintage bulbs?
For lovers of vintage or designer lighting, the cost of replacing specialized incandescent or Edison-style bulbs can be a significant recurring expense. These bulbs are prized for their warm, atmospheric glow, but their delicate filaments are prone to burning out. A dimmer switch is the single most effective tool for maximizing your return on these investments through a principle known as filament preservation.
An incandescent bulb works by heating a thin wire (the filament) until it glows. At full power, this process generates intense heat, which gradually degrades the filament until it breaks. A dimmer switch works by reducing the voltage supplied to the bulb. Even a small reduction has a dramatic impact. By dimming a bulb to just 90% of its maximum brightness, you significantly lower the operating temperature of the filament. This small change reduces the thermal stress on the filament, more than doubling its expected lifespan.
This isn’t a marginal improvement; it’s an exponential relationship. The less voltage, the less heat, and the longer the filament survives. While you do sacrifice a small amount of peak brightness, the financial and practical benefits are substantial, especially for hard-to-reach fixtures or expensive decorative bulbs. This simple act turns a consumable item into a long-term asset.
The return on investment becomes clear when you analyze the relationship between dimming level and bulb longevity. As detailed in the following comparison, the savings in both energy and replacement bulbs compound quickly.
| Dimming Level | Power Usage | Bulb Life Extension |
|---|---|---|
| 100% (Full) | 100% | Standard Life |
| 90% | ~81% | 2x Longer |
| 75% | ~56% | 4x Longer |
This data illustrates a powerful principle: a small reduction in output yields a massive increase in operational life. It’s a clear demonstration of how a dimmer acts as a control system for not just light, but for the very durability of your fixtures.
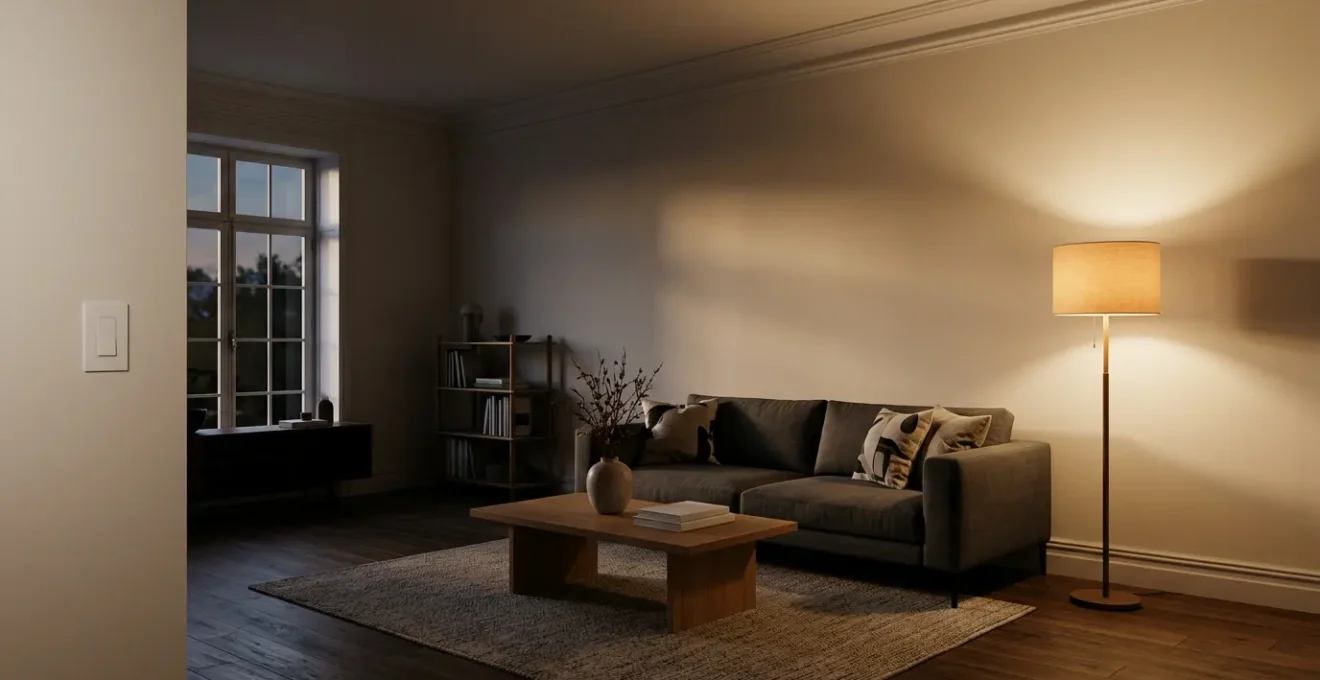
How to use dimmers to “turn off” the kitchen visually while eating in the dining room?
In modern open-concept homes, the blending of kitchen, dining, and living areas creates a sense of space and connection. However, this lack of physical division presents a challenge: how do you transition from a functional, brightly-lit “task” space to a relaxed, intimate “social” space? After a meal is prepared, the visual clutter of the kitchen—appliances, countertops, and dirty dishes—can detract from the dining experience. A dimmer switch is the most effective tool for achieving this separation through a technique called light zoning.
Light zoning is the art of using varying levels of light to define or conceal different areas within a single room. By dimming the kitchen’s overhead or task lighting to a very low level (e.g., 15-20% brightness) while keeping the light over the dining table at a comfortable, warmer level (e.g., 60-70%), you create a powerful visual hierarchy. The human eye is naturally drawn to the brighter areas, so the dining table becomes the clear focal point. The kitchen, now cast in low light, recedes into the background. It is visually “turned off” without you having to touch a single dish.
This technique allows for a seamless mental and atmospheric shift. Smart dimmers make this even more effortless by allowing you to program “scenes.” As the experts at Lutron note about their Caséta system, this level of control is about creating instant atmosphere.
With a simple touch or voice command, control one or multiple lights at the same time by creating a scene. Go from ‘Game Night’ brightness to a ‘Movie Time’ mood in seconds.
– Lutron Caséta, Caséta Smart Home System
This concept of creating a “Dining” scene that automatically dims the kitchen and adjusts the dining pendant is the essence of sophisticated lighting control. It transforms a single, multipurpose space into a dynamic environment that adapts to your needs.
As shown in this example, the contrast between the brightly lit dining area and the subdued kitchen creates a clear separation. This is not just mood lighting; it’s a form of visual de-cluttering, allowing you to enjoy your meal without the distraction of the preparation space. It’s about controlling not just the light, but the focus of the room.
Smart dimmers vs. Standard: which works in older homes with old wiring?
One of the biggest hurdles when upgrading to smart lighting in older homes is the wiring inside the wall. Specifically, the “dreaded ‘no-neutral’ wire issue” stops many projects before they start. To understand this, you need a basic picture of a switch box. In most homes built since the mid-1980s, the box containing the light switch contains a “neutral” (typically white) wire. This wire provides a continuous flow of power, which smart devices like dimmers and switches need to stay connected to your network even when the light is off.
The problem is that in many older homes, the neutral wire doesn’t run to the switch box; it goes directly to the light fixture. A standard (non-smart) dimmer doesn’t need a neutral wire to function. However, most first-generation smart dimmers do, creating a major compatibility issue. A homeowner would open their wall only to find they couldn’t install their new device. This created a clear divide: standard dimmers worked anywhere, while smart dimmers were limited to homes with modern wiring.
Fortunately, technology has solved this problem. A new generation of smart dimmers has been specifically engineered to work in homes both with and without a neutral wire. According to documentation for leading brands, if you find you don’t have a neutral wire, you must use a specific type of dimmer built for that scenario. For example, certain smart dimmers like the Lutron Caséta PD-6WCL or PD-10NXD are designed explicitly to solve this problem. These “no-neutral-required” models are game-changers, bringing full smart functionality to virtually any home, regardless of its age. So, the choice is no longer about which *type* works, but which *model* you need.
Your Pre-Purchase Wiring Checklist
- Safety First: Turn off the power to the switch at your circuit breaker. Use a voltage tester to confirm there is no power in the switch box.
- Expose the Wires: Carefully unscrew and pull the existing switch out from the wall box. Do not disconnect any wires yet.
- Identify the Neutral Wire: Look for a bundle of two or more white wires tucked into the back of the box, often connected together with a wire nut. These are the neutral wires.
- Confirm Connection: If you find this bundle of white wires, your box is “neutral-present.” Most smart dimmers will be compatible.
- Plan for No-Neutral: If you only see wires connected directly to your old switch (typically a black “hot” wire, a red/black “load” wire, and a green/copper “ground” wire) and no bundle of white wires, your box is “no-neutral.” You must purchase a smart dimmer specifically labeled “no neutral wire required.”
How to track sun angles to plan your reading nook for winter afternoons?
Creating the perfect reading nook is about more than just a comfortable chair; it’s about harnessing the best possible light. During the short, often gray days of winter, natural light is a precious commodity. The low angle of the winter sun can create beautiful, warm shafts of light that are ideal for reading, but they are fleeting and constantly moving. The key to a successful reading nook is positioning it to capture this light and then using smart lighting to seamlessly supplement it as it fades.
The first step is observation. Track how the sunlight moves through your space during a winter afternoon. Note where the light falls between 1 PM and 4 PM. This “solar path” is the prime real estate for your reading nook. You can use a smartphone app with a sun tracker function to predict the sun’s angle and position on any given day, allowing you to plan with precision even before winter arrives. Place your chair and side table where the natural light will be strongest and most direct.
The second step is intelligent supplementation. Natural light is dynamic, and a simple on/off switch creates a jarring transition when the sun disappears behind a cloud or dips below the horizon. A dimmer switch is essential for a smooth handover. As the natural light begins to wane, you can slowly bring up the level of your reading lamp, maintaining a consistent, comfortable level of illumination without any abrupt changes. The goal is for the artificial light to feel like a natural extension of the daylight.
This concept of blending natural and artificial light is a cornerstone of advanced smart home control. While dimmers manage your lamps, other systems can manage the sunlight itself. As lighting experts at Lutron explain regarding their automated blinds:
Set your blinds to auto-tilt with the sun using the Natural Light Optimization feature, which automatically adjusts slats based on the sun’s position.
– Lutron, Caséta Smart Wood Blinds Feature
By combining a strategically placed lamp on a dimmer with awareness of the sun’s path, you create a reading nook that is perfectly lit, adapting gracefully from the bright afternoon sun to the quiet of the evening.
3000K vs. 4000K: which bulb temperature flatters your interior finishes best?
Beyond brightness, the most critical quality of a light bulb is its color temperature, measured in Kelvin (K). This metric determines whether the light appears warm (yellowish) or cool (bluish-white), and it has a profound impact on how the colors and materials in your home are perceived. Choosing the wrong color temperature can make expensive finishes look dull, cheap, or “off.” A dimmer adds another layer of complexity, as the appearance of some color temperatures can change as they are dimmed.
The two most common choices for residential interiors are 3000K and 4000K. A 3000K bulb produces a soft, warm white light, similar to a halogen bulb. This temperature is exceptionally flattering to warm materials. It enriches the grain in wood, brings out the depth in leather, enhances the warmth of natural stone like travertine, and makes warm paint colors (reds, oranges, beiges) feel rich and inviting. It is the go-to choice for creating a cozy, traditional, or hospitality-like atmosphere.
In contrast, a 4000K bulb emits a cool, neutral white light that is much closer to natural daylight. This temperature excels at rendering cool tones accurately. It makes stainless steel and chrome fixtures look crisp and clean, highlights the subtle variations in cool gray paints, and provides a clean, modern, and energetic feel. It is often used in kitchens and bathrooms for task-oriented lighting where color accuracy and a sense of cleanliness are paramount.
The effect of dimming is a crucial consideration. When a 4000K bulb is dimmed, its cool light can sometimes appear gray, sterile, or muddy. A 3000K bulb, however, tends to maintain its warm character as it dims. A third option, “Warm Dim” (or Dim-to-Warm) technology, offers the best of both worlds. These advanced LEDs start at around 3000K and automatically shift to an even warmer temperature (as low as 2200K) as they are dimmed, perfectly mimicking the behavior of a classic incandescent bulb.
The following table, based on common lighting design principles, breaks down which temperature best suits different materials and how they behave when dimmed.
| Color Temperature | Best For | Effect When Dimmed |
|---|---|---|
| 3000K (Warm) | Wood, leather, stone, warm colors | Maintains warmth and richness |
| 4000K (Cool) | Stainless steel, chrome, cool grays | Can appear muddy when dimmed |
| Warm Dim (3000K-2200K) | All finishes | Shifts warmer as it dims, maintaining quality |
Key Takeaways
- A dimmer is more than a mood-setter; it’s a control system for energy, bulb life, and well-being.
- Properly matching your dimmer to your LED bulbs (especially regarding minimum load) is critical to prevent flickering.
- Smart dimmers have overcome the “no-neutral wire” issue, making them a viable option for nearly any home, old or new.
Master Suite Design: Creating a Restorative Sanctuary That Improves Sleep Quality
The master suite should be more than just a place to sleep; it should be a sanctuary engineered for rest and recuperation. Every element, especially lighting, should contribute to this goal. By synthesizing the principles of circadian entrainment, color temperature, and automated control, you can transform your bedroom from a simple room into a dynamic environment that actively improves your sleep quality. This is the ultimate expression of lighting control.
The core strategy is to “bookend your day” with automated lighting scenes. In the evening, a “Wind Down” scene can be programmed to activate two hours before bed. This scene would dim all overhead lights to 30%, shift any color-tunable lights to a warm 2700K, and ensure that only essential, low-level lamps are active. This automated “digital sunset” cues your body to produce melatonin, making it easier to fall asleep naturally.
Conversely, a “Wake Up” scene can replace a jarring alarm clock. Thirty minutes before your desired wake time, a smart dimmer can begin to slowly raise the light level in the room, starting from 1% and gradually increasing. Combined with a shift from warm to cooler light temperatures, this simulates a natural sunrise, gently easing you out of sleep. This method avoids the cortisol spike associated with sudden, loud alarms and leads to a more refreshed and less groggy start to the day. This level of control allows you to create a restorative lighting ecosystem tailored to your personal rhythm.
The final layer is intelligent convenience. Motion sensors can be paired with dimmers to create a low-level “Midnight Path.” If you get up during the night, a sensor can activate the bathroom or hallway lights at a barely-on 5% brightness—just enough to see without delivering a shocking blast of light that would disrupt your sleep cycle. This is the pinnacle of thoughtful design: using technology to solve small problems in a way that supports your overall well-being. It is the complete mastery of your personal environment.
Stop letting your lighting be a passive, unmanaged feature of your home. By installing and properly utilizing dimmer switches, you are taking active control over your environment’s mood, efficiency, and its effect on your well-being. It’s time to start designing your home with the precision and versatility it deserves.